And here is a close up of a single one:
Friday, 4 May 2012
Alice themed ATC's
Over on UK Scrappers, I have joined a select group of creative nutters, and we are starting on a round of swaps within the group. The first of these is a set of ATCs based on Alice in Wonderland, for which we each selected a theme or character and made a set of 14 the same so that each person taking part has one from everyone else. These ATCs are being collected together by a very dedicated lady called Rebecca, who will make each set up into a little book and send them back to us. I decided to do the caterpillar, and they have already gone on their travels. I forgot to get a photo of them all together, but here is a picture of them in their box getting ready to go:
And here is a close up of a single one:
Artist's Tools
I was getting messy with glue and paint earlier in the week, and asked my son to wash the paintbrushes for me while I was busy (and then my scissors after I spilled PVA glue everywhere!) When I went into the kitchen later, this is what I found:
He's not normally neat and tidy, so it tickled me the way he had washed them and carefully laid them out, like a surgeon's tools!
Saturday, 21 April 2012
I picked up this wooded box frame from Oxfam for 99p, it was painted lime green all over (yes, that's the colour peeking through the gold because I used a crackle glaze under it) It also had a yellow fabric sunflower glued in the middle. I used a lot of stamps on this project, something I don't usually do, but I am quite pleased how it came out.
Saturday, 31 March 2012
Matchbox Surprise
Wednesday, 21 March 2012
Altered matchbox shrine
Here is a photo of the back, to show that there is still a matchbox in there somewhere!
And some more shots of the front and inside:
Tuesday, 21 February 2012
Chunky ATC
Over on UK Scrappers I have been taking part in a chunky ATC swap. ATC's are usually cards 2.5 in x 3.5 in but chunkies add a whole new dimention - they are wooden blocks 1.5 inches thick, giving much more scope for decorating!
My swap partner specified a Baroque theme in red and black. Now, I really didn't know what she wanted by this, and to me baroque is all about highly decorative architecture so this was the route I took.
Firstly, my block was coated in gesso, then all the edges were painted in black acrylc with an overbrushing of an old gold acrylic.
Next I took my decorative elements including flourishes, frame and a pillar from a dolls house shop cut in half, and painted the. The pillar got undercoated in gold, then a crackly medium was added before a black top coat. The other bits were painted in black and a tiny bit of the gold gently brushed over with my fingertip to pick out the detail.
In the meantime, the chunky was covered in pieces of suitable scrapbook paper. Once everything dried the pillars were added to the sides.
After this I just went ahead and played about with placement of all my chosen embellishments, once I was happy they were all glued in place and the finished chunky went winging its way to its new home.
My swap partner specified a Baroque theme in red and black. Now, I really didn't know what she wanted by this, and to me baroque is all about highly decorative architecture so this was the route I took.
Firstly, my block was coated in gesso, then all the edges were painted in black acrylc with an overbrushing of an old gold acrylic.
Next I took my decorative elements including flourishes, frame and a pillar from a dolls house shop cut in half, and painted the. The pillar got undercoated in gold, then a crackly medium was added before a black top coat. The other bits were painted in black and a tiny bit of the gold gently brushed over with my fingertip to pick out the detail.
In the meantime, the chunky was covered in pieces of suitable scrapbook paper. Once everything dried the pillars were added to the sides.
After this I just went ahead and played about with placement of all my chosen embellishments, once I was happy they were all glued in place and the finished chunky went winging its way to its new home.
Monday, 3 January 2011
Page Planner Card File
At my last scrapbooking crop, we were all given a pack of page planner cards from a local shop, I got some more then realised I needed a suitable box to store them in. I finally settled on a cat food box that had food pouches in, a Sheba one as it was smaller than other varieties' boxes.
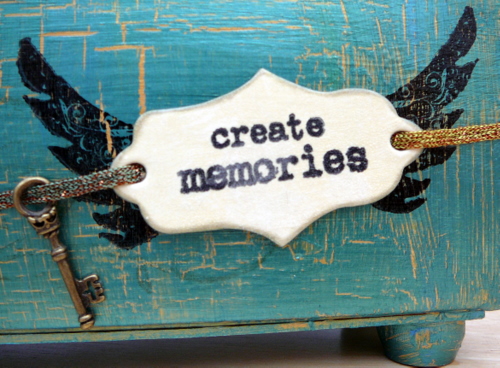
This was lightly sanded, had a couple of coats of gesso before a base coat of gold acrylic. Once this dried, a coat of crackle medium was put over the top and left to dry, before a top coat of a roughly mixed metallic blue and green acrylic was applied. This then crackled nicely to reveal the gold undercoat. I tried to stamp a green flourish on the front of the box but this didn't work too well, but the black wings stamped beautifully! The inside was lined with a piece of Basic Grey paper, which was also used on the fronts of the two card dividers. A few pieces of toning chipboard finished it off. Oh, and the feet were the stands from a pack of dolly pegs from The Works.
Subscribe to:
Posts (Atom)